The Ultimate Guide to Baking Gluten-Free Bread: Tips and Techniques
Bread is one of the most popular foods worldwide. It's versatile, filling, and goes well with many meals. However, people who can't eat gluten often struggle to find good bread. This is where gluten-free bread comes in.
Gluten-free bread doesn't use wheat, rye, or barley. Instead, it uses other types of flour and ingredients to create its texture and taste. When made well, it can be just as tasty as regular bread and is often healthier.
But making gluten-free bread can be tricky. Without gluten to hold it together, the bread can end up heavy or crumbly. Many home bakers find it hard to get the texture and taste just right.
That's why we've created this guide. We'll share tips and tricks to help you bake delicious gluten-free bread. We'll cover everything from choosing ingredients to using the right techniques.
Are you ready to try baking gluten-free bread? Let's learn how to make bread that everyone can enjoy, even those who can't eat gluten.
1. Choosing the Right Flour Mix
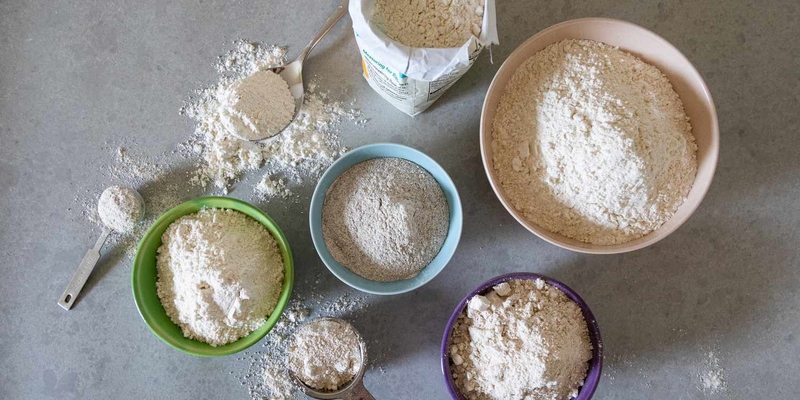
Picking the right flour is key to making good gluten-free bread. Unlike regular bread, you can't just use one type of flour. It would help if you had a mix.
Start with a base of rice flour. It's light and has a neutral taste. Mix in some almond flour for flavor and moisture. Add tapioca starch to help bind everything together.
Each flour does a different job. Rice flour gives structure. Almond flour adds protein and helps with browning. Tapioca starch makes the bread chewy and helps it rise.
Try a few combinations to find what you like best. Don't be afraid to experiment. Some people add a bit of cornmeal or sorghum flour for extra flavor.
Remember, the right mix of flour can make your bread taste just as good as the wheat kind. It just takes a little know-how and practice.
2. Using Binders and Leavening Agents
Gluten-free bread needs help to hold together and rise. That's where binders and leavening agents come in.
Binders like xanthan gum, guar gum, and psyllium husk act like glue. They help the dough stick together and give the bread structure. Without them, your bread might fall apart.
Xanthan gum is common and works well. Guar gum is cheaper but can make bread a bit gummy. Psyllium husk adds fiber and gives a nice, chewy texture.
You'll need leavening agents for rising. Yeast is great for a traditional bread flavor. It helps the dough rise slowly, creating air pockets.
Baking powder works faster, so it's good for quick breads. Some recipes use both yeast and baking powder for the best rise.
Remember, a little goes a long way with these ingredients. Too much can make your bread strange. Follow your recipe closely for the best results.
3. Mastering the Mixing and Kneading Process
Mixing gluten-free dough is different from regular bread dough. It's more like making cake batter than kneading bread.
Start by mixing your dry ingredients well. This helps spread the binders evenly. Then, add your wet ingredients.
Use a stand mixer or an electric hand mixer. Mix on low speed until everything is combined. Then mix on medium for about 2-3 minutes.
Don't overmix. Gluten-free dough doesn't need as much mixing as wheat dough, but too much mixing can make your bread tough.
The dough will be wetter & stickier than wheat dough. That's normal. It should look more like thick batter than traditional bread dough.
If it's too dry, add a bit more liquid. If it's too wet, add a little more flour mix. Go slow - small changes make a big difference.
Remember, practice makes perfect. Keep going even if your first try isn't perfect.
4. Proofing and Rising Tips
Getting gluten-free bread to rise well can be tricky, but it's not impossible. The key is creating the right environment.
Find a warm, draft-free spot in your kitchen. The top of your fridge or near a warm oven works well. You want a temperature around 80-85F (27-29C).
Cover your dough with a damp cloth or plastic wrap. This will keep it moist and help it rise better.
Gluten-free dough usually takes longer to rise than wheat dough. Expect to wait about 60-90 minutes for the first rise.
Don't let it rise too long. Overproofing can cause the gluten-free dough to collapse. It should roughly double in size.
After shaping, let it rise again for about 30-45 minutes before baking. This second rise helps improve the texture.
Be patient and watch your dough closely. With practice, you'll learn to tell when it's ready to bake.
5. Baking Techniques for the Perfect Crust
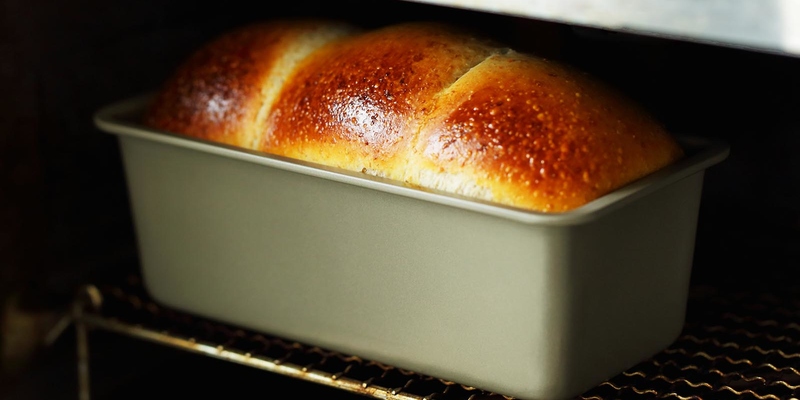
Getting a good crust on gluten-free bread takes a bit of know-how. Here's how to do it:
Preheat your oven well. Most gluten-free breads bake best at 350-375F (175-190C).
Use steam for a crispy crust. When you start baking, put a pan of hot water on the bottom rack of your oven.
Bake your bread in the middle of the oven. This helps it cook evenly.
Gluten-free bread usually bakes in 45-60 minutes. Check it after 30 minutes and cover it with foil if it browns too fast.
To test if it's done, tap the bottom. It should sound hollow. You can also use a thermometer - the center should reach 205-210F (96-99C).
Let the bread cool in the pan for 5-10 minutes, then move it to a wire rack. This keeps the crust crisp.
6. Storing and Serving Gluten-Free Bread
Gluten-free bread doesn't stay fresh as long as regular bread. Here's how to keep it at its best:
Once completely cool, slice the bread and freeze what you won't eat in 1-2 days. Frozen slices toast well straight from the freezer.
Store bread at room temperature in an airtight container. It will stay fresh for about two days on the counter.
Avoid storing in the fridge. It can make the bread dry and stale faster.
Gluten-free bread is great toasted. It brings out the flavor and improves the texture.
Use it for sandwiches, but toast it lightly first to prevent sogginess.
Try it with different spreads, such as hummus, avocado, or nut butter. It's also great for grilled cheese or French toast.
Conclusion
Now that you know the secret of baking gluten-free bread, start making it at home. Remember, baking is not an exact science, and even if your first loaf does not turn out perfect, it is alright.
Keep in mind that every baker has their own story. Do not be afraid to experiment with flavors and additives. You might invent your new favorite bread.
Turn on your oven and start baking. Your gluten-free loaf is just waiting to be created. Happy baking!
Frequently Asked Questions
Q: Can I use a regular bread recipe and substitute gluten-free flour?
Ans: Not usually. Gluten-free baking needs different ratios of ingredients and often requires additional binders. It's best to use recipes specifically designed for gluten-free bread for the best results.
Q: How can I make my gluten-free bread more flavorful?
Ans: Try adding herbs, seeds, or nuts to your dough. Using flours like almond or buckwheat can also boost flavor. Don't forget salt - it's crucial for bringing out the taste in bread.
Q: What's the best way to store gluten-free bread?
Ans: Slice the bread once it's cool, then freeze what you won't eat in 1-2 days. Keep bread at room temperature in an airtight container for up to 2 days. Avoid refrigerating, as it dries out faster.